Throughout the Lions tour we have seen Gatland developing the structures he believes will beat the Springboks. While most of the games were not of the highest calibre, they have provided a useful laboratory for the Lions. By looking at Adam Beard’s try against the Stormers, we can begin to see the fruits of their labours and also some of the teething issues the Lions have had on both sides of the ball.
The sequence starts from a Stormers lineout just inside their half. This first phase gives a good indication of their breakdown policy. First the Lions rely on the tail gunner, Luke Cowan Dickie. The Exeter Chiefs hooker makes an effective low chop allowing Tadgh Beirne to compete. Beirne on this occasion is not able to grab a turnover, but there is significant disruption to the Stormers ball, and allows the Lions to comfortably set their defence.
The Stormers set for a box kick, which gives us an opportunity to look at one of the Lions biggest weaknesses. Their protection of the catch zone. Throughout their time in South Africa, the Lions have been vulnerable to letting the opposition compete and disrupt the ball. This could play a huge part in the series, especially given South Africa favour a kick based game. But what causes this issue?
The main issue for the Lions is the gap between the two Tadghs. Beirne and Furlong need to try and fill the 15m channel, and prevent the Stormers Left winger from having a free run into the catch zone. However Furlong gets slightly ahead of Beirne which leaves a route open to the catch zone for Edwill van Der Merwe. However, the blame does not lie solely with the Irish forwards. Ali Price began falling back earlier than the rest of the team, which means one less body is available to fill the 15m. More importantly though, Price runs an incredibly similar line to Furlong meaning that he is a less effective blocker.
The catch zone may be disrupted but Beirne is able to grab the ball, and passes to Hogg. The Lions immediately look to play the ball wide, with the backs having tracked back to fill the field. Marcus Smith and Elliot Daly fix their defenders, spreading the ball to Duhan Van Der Merwe.
Having reached the edge of the field, the Lions set up their 3-2 pattern. The 3-2 pattern describes the alignment of the forwards across the field. The first pod of 3 acts to fix the initial Stormers defenders, with another pod of forwards further across in the midfield. Placed behind both pods of forwards, is a playmaker. Robbie Henshaw operates behind the first pod, and Daly behind the second. Price passes to Jack Conan who then delivers a pull back pass to an arcing Henshaw.
Henshaw has to run a little flat to take the ball from Conan, which fixes Ernst Van Rhyn (Stormers 4) and prevents him drifting onto the centre field pod. Henshaw manages to free Tadgh Beirne despite the pressure who hits a half gap. Beirne lifts the ball to Jack Conan allowing the Lions to keep the pressure on the Stormers.
Following the carry from Conan the Lions attack kicks into hyperdrive, with Tadgh Furlong making a magnificent break down the centre of the field. The bust by Furlong prevents the Stormers from settling, and means they all concentrate around the ruck. A rapid follow up by Beirne keeps the pressure on before the offload keeps the attack flowing.
Adam Beard then takes a pass from second row partner Jonny Hill, before attacking the space inside the high blitzing Stormers winger. Adam Beard then exhibits some great skill to float the ball to Adam who charges forward. This wide to wide play leaves the Stormers disconnected and struggling to recover.
With the Lions now in the 22, and the Stormers in disarray, they make the final simple play to score. Scrum Half Ali Price breaks away from the base of the ruck forcing the fringe Stormer defender to jam in. Adam Beard then runs a superb out to in line, and canters through the Stormers defence.
There are lots of impressive mechanisms behind this team try, from the Luke Cowan Dickie and Tadgh Beirne breakdown work, to a wonderful use of a 3-2 edge pattern. The try does show some weaknesses that the Lions will want to patch up before the test series begins, primarily around their escort running and protecting the catch zone. Overall, though it is an incredibly well worked try which shows a small part of the Lions attacking repertoire. The test series will see parts of their game tightened up, but the skills are certainly there for the Lions to take their chances when they come.
The British and Irish Lions face South Africa this summer in what promises to be a fantastic series. Both sides are incredibly well matched, and it is almost certainly due to come down to small margins. One area of the game that will be incredibly tight is the lineout. South Africa had an incredibly strong defensive lineout, preventing teams from completing their attacks over 60% of the time. This is a rate beaten only by Ireland and New Zealand. Therefore it will certainly be a struggle for the Lions to gain advantage here. Luckily for the Lions, the best performing team against South Africa at Rugby World Cup 2019, was the Welsh who completed 80% of their lineouts. The man who masterminded this lineout was Robin McBryde, the man responsible for the Lions lineout this year. So what ways can we expect McBryde to target the Springbok strength.
One of the ways that Welsh lineout gained an edge was through the use of non-jumping pods. 20% of the Welsh Lineouts used a non-jumping option last time they faced the Springboks. The non-jumping option, injected pace and gave the Welsh some much needed ball security as they avoided direct competition with the Boks lineout.
Wales start from a seven man lineout just outside the South African 22. Wales begin with Jake Ball walking into a spread lineout formation. The spread lineout is useful as it allows Wales to disguise their call till the last moments. Jake Ball is the lineout caller and acts as the trigger. Once Ball enters the lineout, he calls “SET” which begins the lineout sequence.
Props Wyn Jones, and Tomas Francis peel out of the lineout. This peel means that Ross Moriarty is left alone at the front while Wales load the back of the lineout with multiple threats. As Jones and Francis peel away, Justin Tipuric jams forward, which creates two distinct pods within the lineout. The two pods formed, Francis-Ball-Tipuric and Jones-AWJ-Wainwright, all draw the Boks’ attention towards the back.
South Africa are defending in a 2-5 split, with Vermulen acting as the Pivot at the back. This was a common defensive tactic, and open which we will cover in more detail. The important part here is that the movement from Wales leaves a solitary option at the front in Ross Moriarty. Ross Moriarty not being lifted at the front allows Wales to get quick ball to the backs, and avoids any contest with the South African defensive lineout.
The Welsh lineout has operated with speed and quickly gives Wales a chance to launch one of their common tactics against the Springboks. The importance of clean ball for this attack and to stop major pressure being applied to the kick allows Wales to execute their plan. However, this was not the only example of speed lineout working against the Springboks.
Here England uses a non jumping pod to launch their attack from a 5 man lineout. The non-jump component of this attack means that the ball is undisrupted. While allowing the ball to quickly get to the hands of the England backline. While the pass from Youngs maybe slightly poor, it does show the opportunity if the Lions can execute their speed lineouts.
Most interestingly, the South African defence on a 5 man is incredibly similar to the 7 man against Wales.
With just 5 players, South Africa have loaded the tail of the lineout, which makes any throw to the back more dangerous. They have also aimed to cover two jumping pods, with Number 8 Duane Vermulen acting as a pivot. This deliberate loading of the back of the lineout carries over into their 7 man lineout, as we saw earlier against Wales. The Springboks also have another interesting addition to their lineout in the 7 man, a single man lift.
Right at the front of this lineout the Springboks have placed Pieter Steph Du Toit, and the Beast, Tendai Mtwarria. This gives them a pod capable of competing at the front. Though they can’t get quite as high as the Welsh pod they are still able to apply pressure. It also allows South Africa to cover the back of the lineout with that same 5 man team. This makes the Springbok lineout really difficult to escape, and forces teams to try and win easy, but worse ball at the front.
However, no defence is impregnable and there are always weaknesses with rugby being a game of trade offs. This is why speed in the Lions lineout is going to be crucial. With Vermeulen not fully committed to a pod, the Lions may be able to beat the back pods into the air. This could leave the Lions with plenty of opportunities for their attack, and could be worth the risk. The Lions series promises to be a fascinating coaching and tactical battle, with the teams so well matched. With Robin Mcbryde and Warren Gatland taking on the South Africans yet again I am sure we will see some carryover in how they plan to beat the Springbok Lineout.
Under Wayne Pivac the Welsh lineout has been quite the roller coaster ride. In the 2020 Six Nations Wales had perhaps the worst lineout. Using Simon Gleave’s Lineout Effectiveness Metrics they sat bottom, however by the end of the 2021 competition they had risen to the top. This piece won’t focus on how they fixed the problems, but instead look at how Wales used the lineout as a launch platform. Wales have managed to create a great attacking weapon, not only one which enables them to score but also one which enables them to exit dangerous areas.
The Welsh lineout strategy is dependent on the zone of attack. To begin with we will examine how Wales exited their own 22, and before then moving onto how Wales delivered scintillating strike plays further up the pitch.
Welsh Exit Lineouts
Wales have called a 4 man lineout on their 5 meter line. The idea behind this is to use speed to beat the Irish jumpers. To help with their speed and accuracy don’t bother with any complicated movements instead walking straight into the jump. The simple nature of the lineout is easy to see from the end on angle.
Wales begin with a small walk in, before Tipuric followed by Beard rush forward. The Irish mirror the Welsh Lineout, this means they are reactive rather than predictive. This slight delay gives Tipuric the time and space he needs to make the catch. The throw from Ken Owens hits the apex of Tipuric’s jump. This gives the jumper additional space allowing Tipuric to free his hands and give the ball off the top.
The above screenshot gives a clear image of the Welsh attack shape off 9. As the ball comes off the top, Wales place themselves under high pressure to execute and make sure they can execute the simple move. Faletau (Red Circle) is the lead runner in the formation, with Alun Wyn-Jones, and Tomas Francis as the ruck clearers. This forward pod is set wide from the Scrum Half and allows Wales to reach the 15m immediately. The Welsh forwards are targeting the Irish hinge defender, hoping to make easy yardage while he is isolated.
Switching back to the TV angle, we can see why Wales aim for that 15m line. Faletau, as the lead runner, is able to skip around the hinge defender and make a dominant carry. Once the Number 8 is brought to ground, Wales can enter their kicking shape. The Welsh breakdown is stacked with players giving good protection for scrum half Tomos Willaims. However, they also position chasers on the blindside. Ken Owens and Wyn Jones will act as the containment with Louis Rees Zammit wider to target the ball.
The targeting of the 15m line is a clear trait of the Welsh exit strategy. In the clip above Wales use a near identical pattern to clear their lines. There are some changes, with it being a 5 man lineout as opposed to the 4 man used against Ireland but there are still consistent themes. Wales again used a no nonsense approach, throwing to the front with little movement. There is another small innovation with Navidi at scrum half (more on this later). Faletau then carries, attacking the hinge of the lineout, and targeting the 15m line. This width again allows Wyn Jones, and Ken Owens to be used as containment on the upcoming kick chase.
The two lineouts broken down above give a good insight into the Welsh exit policy. The system uses speed to beat the defence, both in the lineout and when attacking the hinge. Wales have become incredibly good at the nuts and bolts, and this helps join their defensive lineouts with their exit kicking game.
As Wales get further from their try line, they do change tactics though there are still some similarities. The main change is their preference for mauling, especially in their Own 50m. Across the 2021 Six Nations, Wales had 15 lineouts in their Own 50m. Wales used a maul 10 times (66%), and played off the top just 5 times. This is a clear change from their Own 22 where they had 3 mauls and off the top plays alike.
Here Wales partially set a maul in order to draw Scottish eyes to the front of the lineout. They then run a shape consisting of 2 hard runners, one of which is the industrious Faletau, in the midfield. This is designed to give a centrefield platform for the kick. The speed of the play is crucial to its success, with Wales again beating the hinge, and easily winning the gainline battle.
Another interesting aspect are the actions of Tomas Francis. Initially the tighthead prop joins the maul, working round to cover Wainwright. The Exeter player then joins the midfield to help secure the ball. The work rate of Francis has been clear throughout all these moves with the tighthead prop acting as the second arriving forward in all three. While it may not be glamorous, it is important. The Exeter prop helping to give Wales a solid platform to exit and complete their attack.
The Welsh 31 Play
The Welsh lineout attack uses similar structures when it gets into the opposition half. One of the biggest carry overs is the use of a 2 man crashball team. Whether this is composed of backrowers, or centres, Wayne Pivac’s side really enjoy a solid carrying option.
Here is a great example of Wales using a 2 man crashball, this time playing wider off Fly Half Dan Biggar. Launching from the tail of the lineout gives Wales a lot of space, and decreases the distance to Dan Biggar. The speed of the ball allows the Welsh ball carriers to make the gainline and carry through the French tackles. The crashball therefore serves a useful purpose, giving a strong platform to attack from, and allowing Wales to create quick ball. However, the more crucial part of the crash ball is that it allows the Welsh to launch one of their most effective patterns. The 31 Play.
A 31 play is simply a pattern where 3 phases are played in one direction before a fourth phase is played against the grain. Wales use the first 3 phases to contract the defence, opening up space for an expansive return play.
Wales play their second phase the same way as the first, attacking directly from the Scrum half. They use a simple shape to try and disrupt the French defence, with a pod containing Navidi and Alun Wyn Jones wrapping behind the hardline of Jon Davies. Navidi makes an impactful carry, getting beyond the gainline. This carry gives Wales quick ball and allows Tipuric and Faletau to work wider ready for the next phase.
Wales then play the same way for the third phase attacking to the far 15m line. Tipuric and Faletau have gotten really wide from the previous phase. The width allows Faletau and Tipuric to work together, removing the french breakdown threat. The carry also reaches the crucial launch point of the 15m line, which opens the field for a Welsh strike pattern.
This backline play may seem quite complicated with lots of moving parts, but as we break it down, the play becomes easy to understand. Firstly, we can identify the target of the Welsh play, Gael Fickou. Fickou is defending quite wide from his inside defenders, and acts as the “Corner” of the French defence. If Wales can isolate Fickou, there will be opportunities.
To attack the “Corner”, Wales use a 3 layered attack. The distribution, the blocking and the striking layers. The distribution layer comprises the forwards in the red line, and Dan Biggar (White Arrow). Biggar is sitting in the pocket of that first pod, meaning he is able to spread the ball whilst protected by that layer of forwards. Wales then use the blocking layer (Orange Circles) and strike layer (Black Arrows) to target Fickou. The orange layer aims to prevent Fickou connecting with the inside defenders, and to open a space for the strike layer. The strike layer can then isolate Fickou, either spreading the ball wider, or using Liam Williams (Top Spotlight) on the inside. Now, it’s time to see how Wales stitches it all together.
The ball is played behind the orange line, and Liam Williams almost escapes on the inside line. Fickou has done really well to stop Wales getting wider before disrupting the pass inside. However, the strength of the Welsh carry has caused some problems. With Wales going wider, the French backfield has to rearrange itself with Thomas pushing up to the main line. The width has also caused a mild scramble in the French ranks who sweep round the corner to try and match Wales.
Wales flashback again, this time using Adam Beard at first receiver to spread the ball. Tipuric receives the ball with enough space to slide a kick through. The panic Wales have induced with the speed of their attack leads to a lot of space in the French backfilled, and Tipuric attacks it. Adams and Tomos Williams then combine to score. The score may have a fair bit of luck with the bouncing ball but is a great example of the Welsh 31 play and how it laid the foundations for the Welsh to score.
Forwards At Scrum Half
One major innovation from Wales under Pivac has been the use of Forwards at the Scrum Half position. Teams have certainly done this in the past, with many using the “plus one” lineout to either form a maul, or as an extra lifter. Wales have taken a different approach with the forward at scrum half acting as a distributor, a great example of the no numbers on back approach. Under Pivac we have seen various backrowers appearing at Scrum Half giving Wales an additional option with which they can threaten the opposition.
Wales start from a 5 man lineout just outside the Ireland 22. Navidi stands in the position typically occupied by the Scrum Half ready to link with the front jumping pod. Wales then played off the top with Tipuric giving the ball quickly to Navidi. The blindside flanker can then free Taluape Faletau, who runs directly into Josh Van Der Flier. This gives Wales a powerful carrier directly into the Ireland line. Josh Navidi then follows the ball and is free to play scrum half on the next phase.
As a result of Navidi working to play scrum Half, it gives the opportunity for Gareth Davies to play from first receiver. Davies then carries on the blindside, with Wales creating a 3 on 2. Ireland do well to defend this with Davies running lateral, so Wales rely on the silky feet of the Sheriff to get to the gainline. While the Welsh attack fizzles out, it does show the intent and new approach under Pivac.
Wales again start from a lineout just outside the England 22. Navidi begins in the lineout, but pivots to take the ball from the jumping pod. This gives an impression to the English side that Wales will bring a maul, instead they play the ball wider. Wales play with great pace off the lineout. The carry may be ineffective but the attack wins Wales a penalty as England go offside. The attack exhibits just how Wales are innovating under Pivac.
This innovation is a great way of examining one of Wayne Pivac’s crucial principles. The No Numbers on Back attack. By using a high skill forward at Scrum Half, Wales are able to push their attack wider and spread the ball with ease. The use of a Back Rower in this way keeps the defence on their toes as they can’t solely expect a maul from a plus one lineout. Playing off the top is incredibly rare when using a plus one lineout. Of the 276 plus one lineouts over the 2020 rugby championship and 2021 Six Nations, only 27 have been played off the top. Wales are responsible for 6 of these.
Overall, Wales have built a really fearsome lineout attack. There have been great strike moves including those which have resulted in tries. But more importantly they have developed a way of playing off lineout which is truly innovative while built around key principles. The 31 play, for example, which Wales have begun to use is a powerful phase play pattern. It allows Wales to immediately get into their overall attacking shape, while attacking specific weak points in the defensive line. The use of 4 man lineouts on their own line, shows a willingness to take a risk. The four man lineout, offers quick and easy exit patterns, and really help Wales focus on playing in the right areas. Finally Wales have innovated through the use of a forward at Scrum Half. A simple innovation which links perfectly with the no numbers on back rugby they are trying to develop.
Under Wayne Pivac, Wales had a rocky start defensively, conceding over 90 points across for the first time since 2015 in the 2020 Six Nations. The defence wasn’t any better when Wales played in the autumn, when they conceded the 3rd most points of any team. There were still some problems with the defence under Gethin Jenkins with them conceding over 100 points. But there were some general improvements and tweaks as Jenkins got his feet under the table.
Wales General Defence Structure
Wales had a clear defensive system under Gethin Jenkins, with the Welsh defending using a typical 13+2. This means that they have 13 players in the front line, and 2 deeper players covering the backfield. This allows them to use line speed more often, as they often match numbers, while it also covers the kicking spaces well with the back 2 players typically quick to cover the ground.
In the example above, we can see the Welsh 13+2 system at work. France have just won the ball near half way, and begin entering their own phase play patterns. Notice how the Welsh backfield players track the ball. Dan Biggar and Liam Williams stay evenly spaced and try to cover the zone between the 15m lines. The only real time the Welsh backfield do push beyond the 15m is when the ball enters the tramlines. This makes them better at covering centrefield kicks, but has caused problems especially with tactical kicking going into the 15m.
Wales Changing to a 14+1
Whilst Wales generally defended with the 13+2 as above, when they were defending in their own 22 they switched to a 14+1. This allowed them to increase their line speed, and be more aggressive.
This example begins with Wales defending using that typical 13+2 with Ireland attacking in the Welsh 50m area. The backfield is being covered by Leigh Halfpenny and Dan Biggar. The system is the same as described above, however they are adaptable as the Irish attack develops.
This adaptability is incredibly important as Wales transitions to the 14+1 with ease. It begins with a small Irish break down the 5m channel. This leads to Halfpenny partially entering the ruck. As a result Dan Biggar, at the bottom of the screen, pulls across ready to cover the 15m channel.
Wales reform their defensive line incredibly well. Halfpenny (White Arrow) immediately joins the backfield having disengaged from the breakdown. With the Full Back entering the backfield, Biggar (Black Arrow) begins pushing hard to join the front line. This allows Wales to transition smoothly to their 14+1 defence system.
Dan Biggar pushing hard into the defensive line opens the 15m channel kick space. This shows one of the issues with the 14+1, as it can leave a lot of grass uncovered. However, on this occasion the 14+1 is a necessary evil, as Biggar’s actions prevent an Irish overlap. This passage of play shows Wales defending comfortably. Easily transitioning from their typical 13+2, to their 14+1 defensive structure, and covering the Irish threats well.
Defensive Frailties of the 14+1
Every defensive system has its flaws, and the 14+1 is no different. The major trade off in defence is covering the kick space versus having a strong front line. Wales typically uses a 13+2, and then changes to a 14+1 when the ball enters their 22. However, this 14+1 puts a lot of pressure on the Full Back to cover the space and manage the backfield well. On occasion Wales have struggled with this, occasionally allowing dangerous situations to develop, as a result of kick space opening.
Darcy Graham catches a kick just inside his own half, and carries to just beyond the 15m line. Here, the Scottish winger is met by Tauluape Faletau who makes a dominant tackle. This gives Scotland a midfield ruck splitting the welsh defence. As a result Scotland has an opportunity to attack.
Scotland play to the blindside, attacking the soft edge created by the Welsh trying to regain their shape. The weak edge allows Scotland to make good ground, putting the Welsh defence under stress. The team in blue then plays a phase into the midfield to tighten the Welsh defence.
Scotland plays a phase off. Scrum Half Ali Price aims to tighten the Welsh defence. They are also able to trap some players into the ruck. This leads to the wider Welsh defence being exposed on the next phase as 3 players are missing from the main line.
On the following phase, Scotland makes a line break through the centre of the Welsh defence. The linebreak puts Wales under enormous pressure. Wayne Pivac’s side then transitions into their 14+1 defence, as the Scottish attack reaches the 22.
Scotland plays a phase tight off 9 following the line break, meaning the Welsh defence becomes incredibly tight. This phase has shifted the balance of the Welsh defensive line toward the right. This is best shown by 5 Welsh players marking the blindisde, a space filled by just one Scot.
On the openside, Darcy Graham is hidden within the forward pod allowing his run to take Wales by surprise. The snipe from Ali Price draws attention, and gives space for him to kick. Halfpenny is unable to cover the backfield, and Graham beats him to the kick. However, you’ll notice that Halfpenny is offset, sitting near the 15m line, before Price snipes. This is evidence of the pressure applied by Scotland. The pressure applied is even more evident from the end on angle.
The End On angle shows just how far over the Welsh defence has shifted. Halfpenny sits just shy of the 15m line and Davies, the scrum half, has just joined the blindside defensive line. This creates a massive uncovered space in the centre of the field. The panic induced by Scotland has led to Wales overmanning the blindside whilst leaving this crucial zone uncovered. As a result, Price has a large area to aim for, and his kick is perfectly placed for Graham to canter under the posts.
Wales Passive Defence
There are clearly some trade-offs in the Welsh defensive structure. However, Rugby goes beyond just numbers and backfield coverage. There are many facets which make a defence, most crucial of all is how they approach the contact area.
Wales Double Tackling
It’s clear that any side wants to pride themselves on their work in the contact area, and Wales are no different. The first weapon that Wales have is an incredible breakdown game, but they are also able to slow teams down and steal the ball before they even hit the ground. They are able to do this through the use of a strong double tackle game.
This is a perfect example from the Welsh victory over England this year. England end up going lateral in their phase play, and Wales are coping well. This means that when the ball is spread by England they don’t have enough support to protect the ball. George North manages to target the ball as Callum Sheedy drives the tackle towards the welsh centre. The strength of the rip then allows Wales to relieve pressure.
In this passage of play against Scotland, Wales deliberately uses double tackles to slow down the ball before it culminates in a turnover for James Botham. We join on phase 6, and Scotland has been steadily making ground and applying pressure. As the ball is thrown wide, Tompkins, defending on the wing, tries to jam in before recovering and working with Owen Watkin to make the double tackle. Duhan van der Merwe tries to cut inside Tompkins, meaning he can gain quick yards, but it also means that Owen Watkin can attack the ball relatively easily which slows it down for the next phase.
Scotland attack using Fin Russell behind a forward pod. A strong press from Adam Beard prevents Scotland from going wider, instead forcing Scotland to use the short carrying option. Wales again used a double tackle to make a strong tackle with Elliot Dee and James Botham combining. Botham is the primary tackler, staying locked on to the ball as he wrestles the carrier to the floor. This allows Elliot Dee to target the ball as it hits the floor, and while he may not fully release the tackle before hitting the ball, it serves a purpose by slowing down the Scottish ball and allowing the Welsh defence to get ready to absorb another phase.
This tactic of absorption has become a key characteristic of the Welsh defence. The line speed is slow and methodical and gradually turns the screw on the Scottish attack. In this phase Scotland again played wide, trying to flank the Welsh defence. Sheedy and Zammit push higher on the Welsh wing to meet Hogg, and yet again force the Scottish attack inside. Tipuric supports Faletau in the tackle, but is able to easily release when he realises it’s a lost cause.
The effect of Tipuric being able to rejoin the defensive line allows Wales to go and meet the Scottish attackers. Again Wales uses a double tackle, with James Botham and Wyn Jones combining. Botham, clad in a red scrum cap, wrestles the ball free again targeting the tackle from the side. This angle of entry into the tackle means that Botham disrupts the Scottish latchers, and leaves Kebble slightly isolated. However, the main advantage of Botham’s angle of entry is that he can target Kebble’s arm and rip the ball away from the Scotsman’s body instead of against it. This makes it significantly easier and gives the Welshman the opportunity to lever it away.
This entire passage is a great breakdown of the Welsh defence and it’s policies, especially around the contact area. One clear change under Pivac has been a shift from a blitz defence to one based around absorption. This major diversion leads to Wales often giving up soft edges; however, this is designed to support one of their strengths, which is their ability over the ball.
Passive Defence and Breakdown Policy
In this clip we see Liam Williams come up with this great steal directly from use of the weak edge. England stretches Wales with Elliot Daly running a great line to get outside of North. However, Josh Adams is happy to drift, giving up ground, happy that there will be cover inside. George North leads the inside defence, making a strong tackle on Daly. The English Full Back makes significant ground by targeting the soft edge. However, this ground gain comes at a cost. Daly becomes isolated from his support, giving a window of opportunity for Liam Williams to target the ball.
Liam Williams comes in to attack the ruck, noticing the opportunity as he covers in the backfield. The Welsh Full Back’s technique is clean as he attacks the ball first and manages to get a clear lift. The pick up from Liam WIlliams is a moment of pure skill. The steal may be a moment of skill, but has benefitted from a defensive structure designed to give a soft edge.
Again England target the soft edge trying to use their overlap to beat the Welsh defence. England have spread the ball, with Jonny May receiving it outside his opposite number. May tries to attack outside George North but his options are quickly cut off. Louis Rees-Zammit makes a great decision, jamming in, and preventing the offload. George North works well from the inside as a supporting tackler helping to bring May to the floor. Following the tackle, George North stays on his feet and manages to win the space over May. The English Winger rolls to try and buy some time, but this is noticed by Gauzere who awards George North with a turnover.
In these two examples, Wales use their defensive structure to create opportunities. Defending with a soft edge, Wales allow teams to run away from their support, thereby giving their outside backs time to target the ball. This is a defensive strategy built around a Welsh strength.
Under Pivac, Wales have developed a solid defence. It may not have the same reputation as it did under Sean Edwards; however, the ability of Wales to absorb opposition attacks should be admired. It’s also important to remember that Pivac has a different focus when defending. Under Pivac, Wales have become hugely focussed on winning turnovers, whether it being rips in the tackle, or over the ball in the wide channels. Overall, there is plenty of room for development but it is certainly a formidable area of their game.
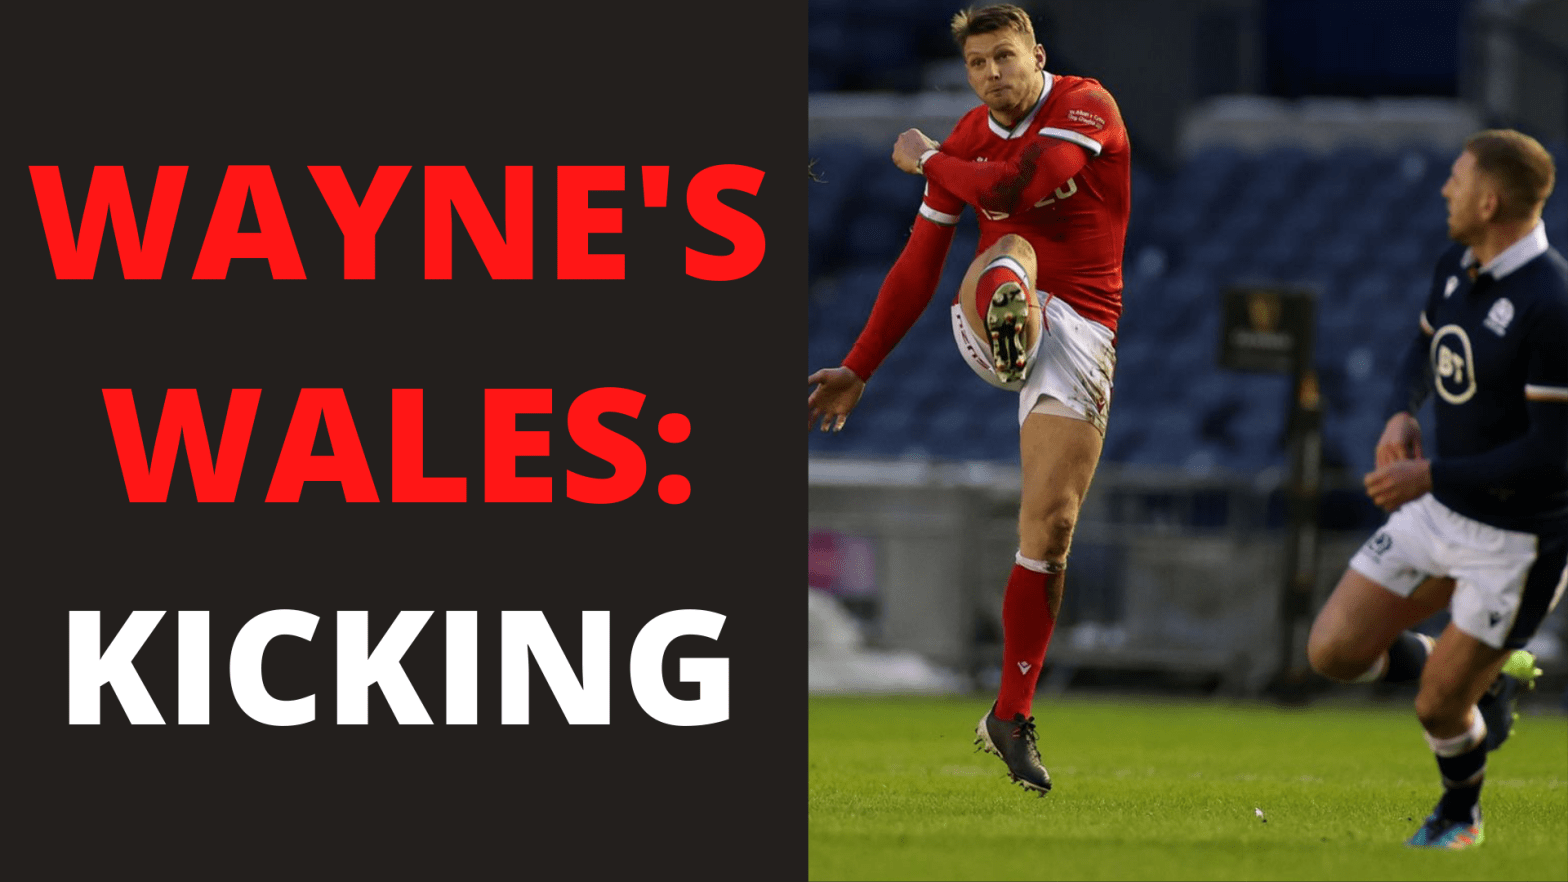
Wales under Wayne Pivac have developed into an innovative and forward thinking side. They have melded various strategies and tactics into a high skill, attack minded gameplan. The development however has not just been on the attack, with innovation also present in their kicking strategy, whether it being double footed scrum halves, 2 man chase teams, or kicking in the 15m channel. All these different strategies have created a great weapon in the Welsh game.
Welsh Exit Kicking
When breaking down their kicking game we can focus on two different areas, their defensive and attacking strategies. First, we will start with their defensive kicking strategy. Primarily Wales are an exit first team, with a strong focus on keeping the ball on the park. The best example of this is the welsh approach v England in the Six Nations. The strategy limited England to just five lineouts, four from penalties and one from a kick from Adams which bounced into touch. The strategy was much more in-depth than just kicking in or out. They varied their kicking strategies by opponent.
The above GIF shows a cornerstone of the Welsh kicking game, the 2 man kick chase. Each team will have their own variations on the kick chase, however there are two common attributes, a containment team and a headhunter. The containment runner, shown in the blue spotlight is responsible for protecting the edge of the welsh kick chase and connecting with the openside chase line. The headhunter, typically the winger, is responsible for firing after the ball and either hitting the catcher or challenging for the ball.
The chase here from Williams is a great example of the role of the head hunter. The Welsh Winger makes a strong tackle getting underneath Daly, allowing him to drive through English Full Back. The effective tackle allows Wales to attack the breakdown. Liam Williams makes a second effort driving at the breakdown. The effort disrupts the ball, and allows Tipuric to apply lots of pressure on the second phase winning the collision.
Wales did have a few struggles in their kicking game in the recent Six Nations, with some scrappy box kicks caused by high pressure, including the Maro Itoje charge down in Cardiff. While it wasn’t a major problem, it does allow us to examine how Wales protect their scrum halves when kicking and another example of a high skill approach being taken.
Let’s begin by examining the first Welsh box kick against England in this Six Nations. Wales are running a 3 man protection team. This gives Gareth Davies plenty of space to make the clearance. The 3 caterpillars give plenty of space and protection for Gareth Davies. It’s important to notice Itoje’s positioning, who sits in the guard position giving him a short distance to the Scrum Halves foot.
This scheme is not particularly innovative, with it being a common strategy used to protect the Scrum Half. However, it does exactly what is needed with plenty of protection for the Scrum Half. Crucially it also gives time for the team to set up for the kick. Notice the 2 man chase team on the blindside.
On this occasion Wales received the ball from an England restart in their own 22. Wales then take the ball ground just inside the 22. However, whereas in the previous example they use a 3 man protection group, Wales instead use just Justin Tipuric as a single extension. This leaves the ball significantly closer to Itoje standing yet again in the guard position. The launch from Itoje is explosive, and he gets onto one foot extending as high as he can. The extra height allows him to get a hand to the ball. Wales do manage to recover from this moment, but it goes to show how important the 3 man protection scheme is for the Welsh Scrum Half.
However, the Welsh Scrum Halves have developed another useful tool. A second foot.
The Two Footed Approach
Wales here again use a 3 man protection scheme, with Adam Beard and Alun Wyn Jones combining at the front to lengthen the caterpillar. Because the two second rows aren’t on their feet Davies is under some pressure from Gray but takes a step back to beat the Second Row. Gareth Davies uses his preferred right foot, driving the ball, finding good height which allows Louis Rees Zammit to headhunt Matt Fagerson. But later in the same game we see him switch to his left foot.
This time, Wales are exiting from a lineout maul. The lineout drive has tied up all of the Welsh forwards, close to the 5m line. This means Gareth Davies has to kick from barely one body length of protection. Worse still for the Welsh Scrum Half, Rory Sutherland and Scott Cummings are bound into the maul and are able to apply pressure on his favoured right side. The pressure forces Davies to switch foot. While the kick from Davies comes from a weaker foot, he still manages to drive it a decent distance. The ability to kick from his left foot gives Davies a quick way to escape pressure and is just another example of a high skill approach being taken by Wales.
Individual Kick Chase Skills
The Welsh Scrum Halves of course are not the only highly skilled players. One of the most important roles in the Welsh kicking game is the Head Hunter, typically performed by a winger. To be a headhunter, the Wingers need a variety of skills. Most importantly, they should be able to challenge the ball in the air. Using just one example we can break down how Louis Rees Zammit acted as the headhunter to help Wales reclaim the kick.
Wales have a really well organised chase line with 3 players outside Dan Biggar. Louis Rees Zammit is positioned second in from the touchline, ready to target the ball. This setup is very similar to their 2 man chase teams on box kicks. Wales have a headhunter chasing the ball, and targeting the catch zone. While a second layer offers protection from a counter attack.
Louis Rees Zammit as the head hunter is targeting the catch zone. The catch zone is simply the area where the ball is going to land, if a team can dominate this space then they are most likely to win the ball. The Louis Rees Zammit first beats the French escort runners who tried to obstruct his run into the catch zone and then positions with his back to Dulin. This positioning means that if Rees Zammit can slap the ball it is more likely to travel backwards. His positioning also makes it difficult for Dulin to make a clean catch.
The Welsh Winger is able to slap the ball back for Wales, into Navidi’s grateful clutches. This clip is just one example of how Wayne Pivac has optimised the Welsh kicking strategy for his stable of thoroughbreds. The Welsh regaining the ball, allows them to gain ground with less effort and less physical exertion leaving them fresher later in games. Once Wales do catch the ball, it also opens up the field for attack, and they are often able to exploit the space.
Welsh Kicking In The Wide Channels
Wales, as discussed in a previous blog, have played an attacking game based around width and attacking fringes of the defence. One of the key elements of this has been their use of a roaming back 3. This strategy has also been combined with the Welsh kicking game.
This example comes from the Welsh game against the French in Cardiff. Wales have played 2 phases since Halfpenny took the ball from a kick on the right hand side. With the game entering the final quarter, Wales spread the ball, beating the French defence. The first two phases contracted the French defence and enable Wales to play wide. An early pass from Biggar allows Adams to attack the outside shoulder of Virimi Vakatawa and free Tompkins in the outside channel. The Welsh pressure outwide forces Bouthier to come up from Full Back to stop Wales running. This opens up a channel in behind for Wales to kick into. The power of this kick is then shown as Tomos Williams is first to get to the ball, after running a great “cheat” line, and toes it on. The bouncing ball causes France some problems, and Ntmack is forced to come and shepherd the ball off the field.
This wasn’t just a once off tactic from Wales, with it becoming a powerful strategy in this year’s Six Nations. The power of this tactic comes from being able to expose the modern day defence. Most modern day defences prioritise line speed, and applying pressure in the immediate. This often leaves significant space in the backfield, usually covered by just one or two players. The lack of cover in the backfield is most prominent in the wide channels. As a result it leaves some luscious green space for good kickers to find.
Using the End On Angle from the Welsh trip to Murrayfield we can see how they expose this space. Wales start from a midfield scrum, splitting their backs across the field. The Scottish Scrum Half defends from the boot of the scrum, meaning there is no pressure on the Welsh Scrum Half. Wales spread the ball, forcing Scotland into an early drift. Biggar gives an early pass to Tompkins who gets to the outside of his opposite defender. The scottish winger, Duhan van der Merwe who had been holding his depth had to press forward and join the defensive line. This opens the space in behind into which Tompkins can kick.
This Welsh kicking strategy is designed to apply pressure once a defence is beginning to creak. In both examples above Wales have passed the ball early to the 15m channel. The ball carrier then closes on the defence, with space outwide forcing the defender to sit off. The aggression in the carry and threat of the overlap forces the backfield to readjust and leaves space uncovered for the kick. This tactic is particularly strong as it is built on cores of Pivac’s philosophy. Under Pivac, the Welsh have developed a ball flinging, edge finding attack. The kick in the 15m is simply another tool ready for them to use. The tactic also benefits from players with good awareness, a willingness to take risks, and high skill levels particularly under pressure.Wales have these characteristics in abundance, and it all came together for one of their more controversial scores.
We join the play during a Welsh attack just inside the English half. After Wales have worked their way up to the edge of the England 22, playing from wide to wide. England have transitioned into a 14+1 defence, with just Daly defending the back field. Daly is positioned well, following the ball and sliding with the Welsh attack, however at each ruck he has to make a choice, whether to cover the blindside or the openside.
Daly is positioned to the openside for this Welsh breakdown, however he has to pay some attention to the Welsh blindside attack. The England Full Back has been working across the back field during the Welsh attack getting just beyond the left hand post. Ken Owens (Black Arrow) has begun shifting to the blindside, and this combined with the ruck helps drag Daly slightly to the left of the posts. This leads to a shift in Daly’s bodyweight, with the England Full Back working back across to the left before having to pivot again to track the Welsh openside attack.
Wales play to width on the openside, looking to stretch the English defence. The phase begins with a wide pass from scrum half, Kieran Hardy, skipping out Tomas Francis to George North. North has to wait a little for the pass, his initial depth gives him time to avoid the initial pressure from England and still pass the ball early for Adams. Adams has worked from his Wing, attacking on a curved line to get outside his opposite defender. This causes a drift in the English defence who end up on their heels. With England in a 14+1 defence there is plenty of space for the kick from Adams.
The kick is perfectly directed which allows Rees Zammit to win the foot race. The kickforces Daly to accelerate so he can cover the ground before trying to slow down and take the ball. Daly misses the ball, choosing to target Zammit. Instead the ball bounces fortuitously for the Welsh winger, hitting his leg and bouncing through for Williams to gather. Some will argue that the try is lucky. However it does act as a great example of a side making their own luck. The kick in the 15m channel has been a persistent tactic for the Welsh, and this try takes advantage of the havoc a bouncing ball can cause.
Kicking in the 15m was also profitable in the final Six Nations game against France. Again Wales are playing against a 14+1 defence, with only Dulin covering the French backfield. This passage also offers another insight into the Pivac philosophy, showing how even in the kicking game, there truly are no numbers on backs.
Wales again attack from a midfield ruck, and have split their attack accordingly. However, unlike the last clip, rather than all the back 3 roaming in the wide channels, Tipuric and Faletau have combined with Adams in the 15m channel. The simple objective of the play is to target the space behind the French line. France blitz hard in defence, especially Virimi Vakatawa who tries to target Tipuric, after a slightly high pass from Adam Beard. However Tipuric, transitions well from his catch to his kick. The kick is slightly wider, and Josh Adams has to use his own footballing skills. This try is incredibly similar to the Liam Williams score v England, with Wales again exposing a 14+1 backfield. This is clearly a powerful tactic introduced by Wayne Pivac, with the bouncing ball causing massive problems for the covering defenders. That the skill can be executed by the forwards, like Tipuric here or Faletau in the autumn, and the backs alike shows a clear example of the “no numbers on back” in the Welsh kicking game.
The advantages of this strategy are clear, especially with the highly skilled individuals. The fact this policy involves high skilled players, regardless of position is no mistake. Wayne Pivac has aimed to create a highly skilled team, which has threats across the field.
Overall, the Welsh kicking game both when exiting and attacking is predicated on individual skills, built around a solid structure and system. When Wales box kick they have a 2 man chase team, helping to protect against the touchline break and allow the headhunter to target man and ball. This strategy also benefits from Scrum Halves being able to kick off both feet. The Welsh use of attacking kicks is also built from individual skills within a structure and system. The clearest example though of individual skills, is the Welsh kick and regain strategy. Again it’s built into a structure with a clear head hunter, and containment team, but the high skill nature of taking a highball acts as a really great attacking weapon. The kicking in the 15m is a direct result of their general attack strategies, and their overloading of back three players. The tactic benefits from a back three all comfortable when kicking, and a team capable of distributing with pace. The forwards in the Welsh team are becoming threats even in the kicking game, an indication of the no numbers approach. In every aspect of their kicking game, Wales use both individual skill and solid structure to exploit defences. The blend that Wales have developed should help them prosper with kicking such an important part of the modern game.
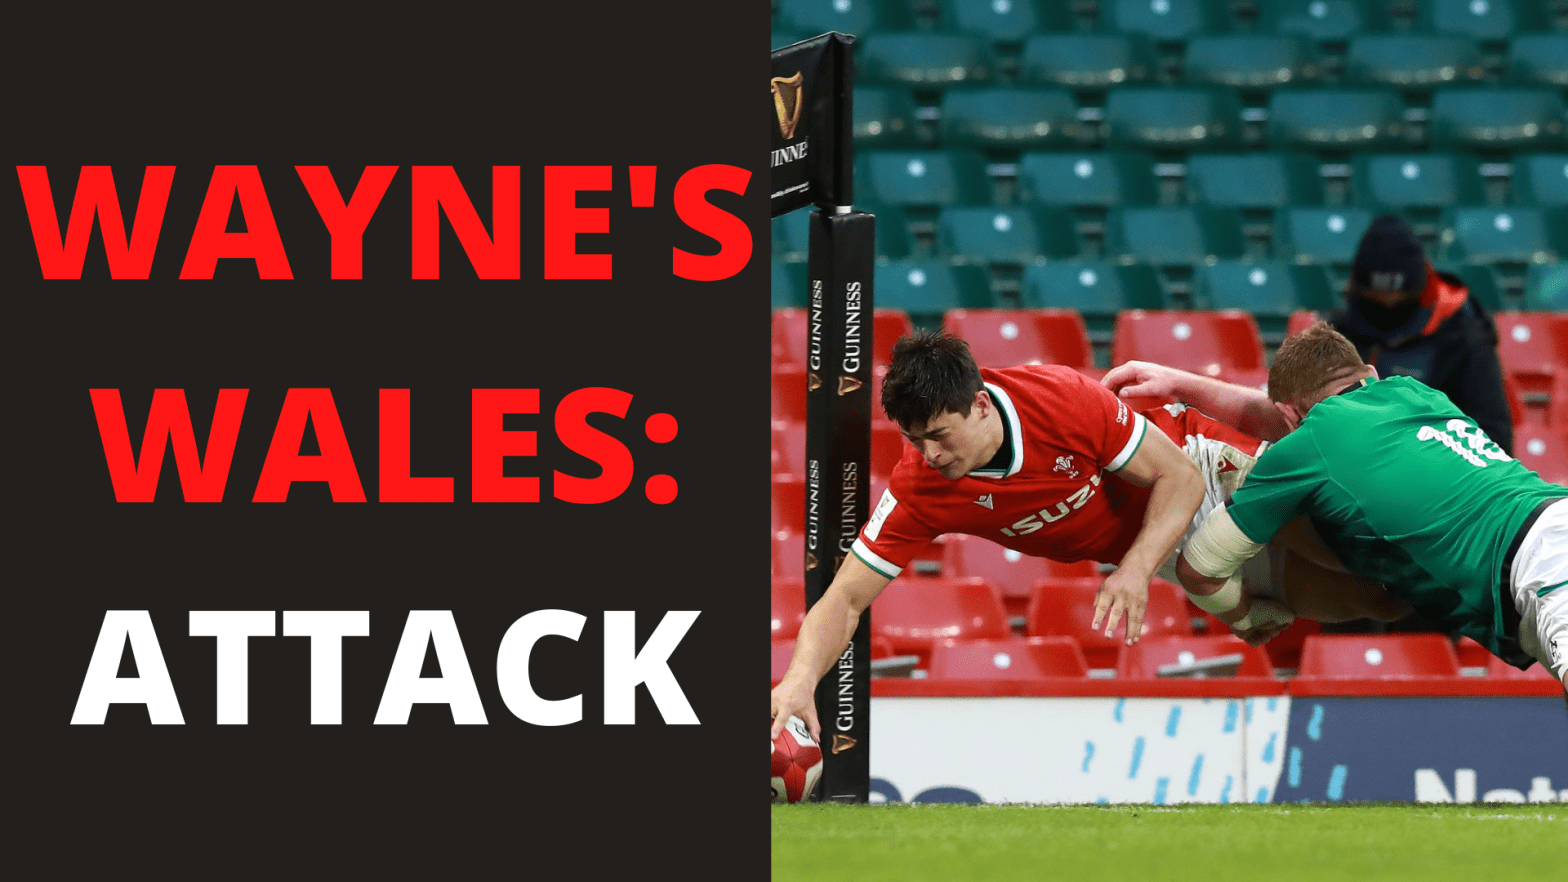
Under Wayne Pivac, Wales have developed one of the strongest attacks in the Northern Hemisphere. In the 2021 Six Nations Wales scored the most points on their way to the title. One of the main drivers of this success has been the innovations by Pivac and Stephen Jones especially around the “no numbers on back” approach they have been using. This no numbers on back approach means all the players became capable of performing various roles, such as playing first receiver regardless of position. However, this is not the only innovation that has been a key victory, with various tweaks and improvements to their general style proving successful under Pivac.
The No Numbers On Back Policy
It is with the “no numbers” approach that we will start, given how crucial it has been to the welsh attack. The approach is beautiful in its simplicity as Wales are gearing their game towards speed of ball, and having players capable of filling the majority of positions across the field. One of the key elements of this attack is the highly skilled Justin Tipuric, who provides great handling skills, and can act as a second distributor to help spread the Welsh attack, like he does here against the French.
The example above is from the second phase of a scrum attack. Wales have loaded their Centres and Wing Josh Adams on the blindside, which limits their ability to play wide on the second phase. This is a great indicator of Wales’s willingness to play with no numbers on their back. This is because it leaves just 10 and 15 as playmakers and distributors in the wider channels, using Tipuric to fill the role.
Tipuric’s role also means that Wales can maintain their pace when they attack the openside, rather than the ball getting caught up within the forwards. Tipuric has held his depth, meaning that Biggar has an easy pass, before passing to Liam Williams who has time and space when he gets to the ball for an easy pass to Louis Rees Zammit. The result of this extra time and space, is that Wales are able to go from 15m to 15m in just three passes, and force France to defend laterally. The kick decision is also incredibly easy, given the 14+1 France are favouring. Dulin has been pulled side to side, and Wales find space behind the French line.
However this welsh attack policy has a more far reaching impact when we examine it within a phase play attack. This comes to light when we examine the Hardy try v Italy in the Autumn nations cup. Built from sustained phase play, the Hardy try shows how Wales’ use of loaded backs, and highly skilled forwards where beginning – even in a rather dour campaign – to come together to create brilliance.
We join the try mid phase play after Wales have stolen the lineout ball of the Itallians. From this midfield ruck, Wales run a variation on a blocker play which forms a part of their attack playbook. With Jon Davies receiving the ball off the Scrum Half, Sheedy can work round the back to offer an option. However, on this occasion Jon Davies straightens, dragging Canna into a ruck.
Wales now worked their backs all to one side of the field, looking to attack Italians with a more physical play. North is driven on by Louis Rees Zammit while Elliot Dee comes in to finish securing the ball.
Having won the ball out wide, Wales have set into their typical attacking shape with a single three man pod and two further two man pods out wide. However, it’s not the numbers in the pods that are particularly important here. Instead our focus should be on Sheedy’s role as he inserts himself into the pod, operating flat to the line. This is an incredibly common edge shape for Wales, and something we will return to. This shape allows Wales to split the Italian defence, striking right at the centre. It also allows a quick ball with two cleaners following up on the carry at the weak shoulder.
The screenshot above shows how Wales have set their shape, in order to target the space they have created in the Italian line. The first thing to notice is how deep Tipuric is attacking. This gives him plenty of time to adjust his angle depending on Canna’s (the Italian defender outside the space) decision and body shape. This position is integral to what unfolds.
Looking in more detail at the play, we can see how impactful Tipuric’s positioning has become. As Faletau receives the ball almost flat to the Fly Half, he can fix the two inside defenders. However the Italian defender Canna on the outside of the black circle loses connection slightly giving Tipuric the space to target. The highly skilled Faletau can then pop the ball to Tipuric to run through the line and make a break.
Watching in full speed we can see how quickly Tipuric adjusts his line, blasting through the Italian defence. But we can also see how influential Pivac’s doctrine of no numbers on backs is. While Sheedy is at Fly Half, it is actually Faletau in the main decision making role, with three clear options. Faletau is able to either carry, pull it round the back to Jon Davies, or to tip it on as he does. This multi-decision play is an example of not only the system but Pivac’s trust in it.
The Welsh Attack Shape From The Edge
Now let’s look in more detail at one of the more common attacking patterns used by Pivac, a Fly Half insert pod. This shape is particularly prominent when they play from the edge. The shape is a wonderful example of the power of structure and how it can exploit the defence.
The still from above is just a general example from Wales’s first attack under Pivac. It shows what would become an important shape for Pivac’s game plan. Characterised by the Fly Half standing in the centre of the pod, this edge shape can really help Wales influence the defence. The inside runner can provide a good hold on the inside defenders, whilst the outside runners can either act as blockers for a pull back play or hit the ball hard.
By using it off the edge, Wales are able to set their attacking 1-3-2-2 framework early, and it gives plenty of time for the playmaker to attack the defence and size up the right options. The options are the true magic of the play, with the insert shape giving four clear options depending on the preference of the decision maker. Firstly, they can decide to pass to the hard runners who attack their outside shoulder. Secondly, the Fly Half has the option to play wider by using the pull back option, aiming to attack the corner of the defence. Third, they could decide to pop the ball on the inside, in order to relieve pressure from a blitzing defence. If all other options are exhausted, the Fly Half can carry from the shape.
On this occasion Dan Biggar lifts the ball to the hard runner on his shoulder, Wyn Jones. By using the tighter option it gives Wales a fast clearing option as Jake Ball can cut across and pin the Italian tacklers into the ruck. This simple edge attack move may only be a small cog in the game plan but allows for some wonderful variations which help Wales break teams down.
There are multiple ways in which Wales set about breaking sides down, based on this shape, and their general attacking framework. The handling between the different elements of the pods helped them open the defence, like we saw in the Hardy try earlier. This edge play allows for some wonderful variation based on the Pivac doctrine of “no numbers on back” rugby. For example, the use of a roaming back three which Wales have become adept at using to break teams down.
In the same attack against Italy, Wales have now set a 2 man pod outside the Fly Half, as part of their general attack structure. However, instead of both runners being forwards, one of the roles is performed by Winger, Josh Adams (Blue Spotlight). This gives Wales additional pace within the midfield. On this phase, Wales use their other Winger, Johnny McNicholl (Red Spotlight) who wraps off his wing, operating as the pull back. The use of roaming Wingers, is a clear example of the no numbers on back policy.
Later on in the same attack, Wales do pull the trigger releasing from a pod. While the setup is slightly different with Adams on the inside, it is again based on their common phase play shape. The two hard runners (white rings) outside the playmaker, draw the Italian pressure. This leaves a small hole just outside the ‘B’ defender who is hung out to dry. Adams (Red Spotlight) attacks on the inside. The strength of the carry, especially against a weak inside shoulder, allows Adams to get his hands free and offload to the Scrum Half on the inside. The offloading attack is a clear example of Wales focussing on developing a high skill attack.
This interplay didn’t just deliver line breaks, it also directly delivered tries, such as this beauty from Tomos Williams.
Wales rather than using the edge shape we have been discussing, are now flowing through to the end of their structure playing off the one forward out wide. The quick ball from the previous ruck is important as Justin Tipuric stayed on his feet long enough for Dillon Lewis and Hadliegh Parkes to clear out. The quick ball allows Tomos Williams to beat four folding irish defenders with a pass and gives Alun Wyn Jones, a one on one carry against a scrambling Bundee Aki with Murrary swimming off early. This allows the welsh Lock to stretch through the tackle and control his landing. With his hands free Alun Wyn Jones can pass inside to Dan Biggar who has run through the Irish line. Biggar can then combine with Tomos Williams to provide an offload for a truly flair filled score exhibiting the Welsh gameplan.
The Welsh Attack Structure
The Welsh attack is built from a doctrine of no numbers on back but it is still structured, using not only the attacking shape shown above but with a typical attacking structure. Some may bemoan the use of structure and formations in modern day rugby, however Wales have melded this with their no numbers to produce some fantastic opportunities and scores. The structure Wales have employed have been variations on the 1-3-2-2 shape, pioneered by Japan at Rugby World Cup 2019. One of the main innovations that Pivac has overseen is a use of a roaming back three, with them often loading on to one side of the field. The overall structure of the Welsh attack is easy to see in this passage against England.
The Welsh attack begins from a lineout maul drive just inside the English half. Using two pods of three, Wales take their attack to the 15m line. These phases allow Wales to get their forwards on feet, and they begin to set their attacking structure.
After the first two phases, Alun Wyn Jones (White) has worked around from the maul on the touchline to form a midfield pod with the two Welsh Centres (Blue). Jones positions on the inside of the pod, acting as the primary cleaner and giving the welsh quick ball. The strong carry by Halaholo forces a double tackle, and traps Curry and Farrell on the wrong side of the breakdown.
The outside backs have now loaded up in the outside channel, with Rees-Zammit (14) inside of Williams (15) and Adams (11) on the edge. Sheedy gives a well timed pass which forces the English Full Back to come up and cover the wide channel. The threat of the outside backs causes England to commit out wide and they are left tight on the next phase.
Wales use their typical edge attack shape with Callum Sheedy inserting in front of the pod of three forwards. Wales have also formed a second pod slightly wider holding the English defence. Sheedy’s break comes as a result of exploiting holes created by this structure. The animation of Navidi inside puts Cowan Dickie on his heels just for a second. The Hooker is not helped as he is defending alone with his inside exposed by Itoje’s slower line speed.
From using the end on angle, we can also see that the break stems from England’s defence being completely worked out of shape. Callum Sheedy (Red Ring), stands opposite Cowan Dickie who is completely exposed on either side. Wales have filled their positions well, flowing within a structure. From here, Wales strike hard and fast at the gaps they have created. The break has been caused not only due to individual brilliance but also a attacking framework and structure.
The welsh use of structure does not just lead to holes and line breaks however with it also delivering one of the tries of the tournament. A mixture of individual brilliance, and superb tactical play to expose holes created by the structure gave us a masterpiece of a score from Louis Rees Zammit.
A carry from Taulupe faletau sets a midfield platform, and allows Wales to gain front foot ball. The dominant nature of the carry means that the Welsh forwards can enter the breakdown immediately without having to work round to get through the gate.
Off the next phase Wales search for width, Sheedy positions in behind Ken Owens to receive a pull back pass, with Tipuric dropping back allowing Wales to reach width. The phase may go sideways but it allows Wales to form into a 1-3-3-1 shape across the field with Alun Wyn Jones supported in the clearout by three backs.
Playing from the edge, Kieran Hardy finds Callum Sheedy as Wales look to attack the Scottish midfield. The Scottish line speed is good, and the double tackle strong, however Wales are able to fold round faster and it’s the speed of the fold which causes problems on the next phase.
Wales then use a variation on their typical attack shape, with two hard runners off Sheedy and the addition of a clear pull back option. The two hard runners force Scotland’s defence to shut them down. This turns Chris Harris (Blue Spotlight) inside. Sheedy gives the ball early to Adam Beard who shows great handling skills and lifts the ball cleanly to Halaholo who bursts round the corner of the Scotland defence. This attack is a clear indication of the Welsh gameplan, and them attacking off the Fly Half. Their general shape with an inside runner plus two outside runners give Wales lots of width with the added threat of a pull back option from both 10 and the hard runners outside. This added threat causes real problems for the Scotland defence as it exposes Chris Harris.
The welsh attack beats Harris, on the outside forcing him to defend with a soft drift and give up ground. As a result Wales can unleash their wide men, with Halaholo’s run linking him with Faletau, and Louis Rees-Zammit. Halaholo gives the Welsh speedster the ball with a perfect pass enabling Zammit to easily beat Duhan van der Merwe. The chip kick is an audacious piece of skill, and shows yet another example of the high skill, high reward play Wales have adopted under Pivac.
Summary
The Welsh attack has delivered some fantastic moments under Pivac, and was certainly the strongest attribute in their championship win scoring the most points. However, while the 32 points per game is impressive, what has also been fantastic is the manner in which Wales have scored these points. They have innovated and added layers to their attack with the use of roaming back three players especially important in the new Welsh style. Most interestingly, Pivac is developing a game plan which relies on high skills across positions with forwards playing increasingly important roles in spreading the ball. The Welsh attack is their own distinct brand, but also intriguingly shows what Rugby could become as a no numbers approach becomes more common.
France are the big story of international rugby in 2021. From the strong showing against Italy to an assured victory over Ireland, Les Bleus have continued to make good on the promise they showed in 2020. They have also been innovative, and their first try against the men in green shows a new development of their lineout attack.
Starting in the Ireland 50m zone, gives France a perfect opportunity to attack. France call a 6 man lineout. The 6 men in the lineout are 5 forwards and Antoine Dupont who is hidden at the front of the lineout. Matthieu Jalibert acts as receiver, providing France with their two playmakers immediately available from the lineout.
France’s new lineout formation involves both playmakers within the 10m space.
This system with both halfbacks hovering around the lineout allows France to spread the ball earlier. This is because as the ball is thrown, Ollivon catches while Dupont begins to move, attacking the pass down with speed. The French scrum half being quickly able to get the ball and spin a simple pass to Jalibert allows the move to flow. Matthieu Jallibert, who bounces out, can then receive the ball on the gain line.
France play off 10 with Fickou attacking Billy Burns and winning the Gainline.
Matthieu Jalibert bouncing out holds Josh van der Flier, the connecting defender, of the advancing defensive line. Jallibert is also attacking Josh van der Flier on the gainline, as the France 10 only has to take a couple of steps backward before attacking the pass. The connection to a midfield pod allows France to attack Burns in the Irish defence, despite Ireland trying to hide their Fly Half with two forwards on the inside, and the strong tackle of Henshaw on the outside. Jalibert unleashes Fickou down his Burns’ channel. The French centre wins the collision stepping inside to beat Burns and splitting the Irish defence. Fickou is positioned on the outside of a flat crash pod. The pod also contains Alldritt, not used in the lineout who can offer protection of the ball and allows France a fast ruck.
French forwards wrap around and fill the channel off 9. Dupont plays behind the blocker and then France break the Irish defence.
This quick ball allows France to unsettle the Irish defence. With Billy Burns still retreating from his missed tackle, Henshaw has to hold on the advancing blockers on Dupont’s shoulder. This allows France to beat the Irish fringe and target Josh van der Flier’s (Red Scrum Cap) channel. The Flanker becomes isolated as Ringrose tries to spook the French attack inside. With Josh van der Flier over running Jallibert, who gladly takes the opportunity to carve the inside with his outside well defended. This linebreak allows France to show what has made them so wonderful to watch over the last year. The break is incredibly well supported allowing France to throw audacious offloads and take risks. This is because every ball carrier always has at least one passing option available to use. Dupont’s piece of magic gives Penaud the ball and allows the winger to cut inside and take play 5m out from the Irish line.
Jamison Gibson park bites in on Fickou and allows the Frenchman to free Ollivon into the corner.
Following the linebreak the French flood the channel off 9 with forwards running at pace. This prevents Irish players reloading to the opposite edge of the field. The linebreak has had a particularly massive effect on the position of Ireland’s backs. Due to speed of the French attack, only Jamison Gibson-Park is on the openside of the field. This means that France are effectively attacking a 2 v 2 when the ball reaches Fickou, the centre can quickly go around Ruddock despite a poor pass, and free Ollivon. Ollivon has an easy run in, as the Irish Scrum Half jams in and misses Fickou’s offload. This is likely an individual error and Gibson-Park has reacted to the bounce of the ball. However, this should not take away from the fantastic French score.
However it was not the only time this French lineout innovation has led to a scoring opportunity. Another lineout in Ireland’s 50m zone allows France to attack using the same innovation. This time however, rather than having Fickou carry hard, Jallibert passes to Alldritt at the centre of the French pod. This is maybe because Fickou has lagged slightly behind the centre of the pod. However, Ireland have also shifted CJ Stander and Burns around, this means Alldritt is also the best placed carrier to target the Fly Half. This allows Alldritt to make a positive carry and breach the gainline.
Again France use both Dupont and Jallibert in the Lineout. They also use a pod of 3 forwards off the Fly Half from the lineout.
The French again followed with a second phase close to the ruck. Julien Marchand charges around the ruck, running a hard line off Dupont. The hole opens for Marchand due to a number of different factors. The carry from Alldritt has trapped both Burns and Stander on the floor, who unlike the previous phase are unable to rejoin the defensive line. Dupont has also stepped off the base taking the interests of Herring at guard while Josh van der flier is in two minds about the different options around him. This creates an indecision which leads to two weak tackle attempts from the fringe defenders and that allow Marchand to bust through and make ground.
Marchand runs a direct line off Dupont and brings play to the Irish 5m line with a physical carry.
While the final phase does backfire, with the ball fired off Jelonch’s head, France still create the opportunity to score. Indeed, France fractured the Irish line completely, creating a massive disconnect between both Ringrose (Blue Circle Below) who was leading the outside channel defence, and the folding fringe defender (Black Circle Below) who got held by the French players in the breakdown. Another key part of this is the action of Henshaw (Red Circle Below) who steps behind the ruck, unsure that Marchand has been stopped. This means he doesn’t have enough time to reposition and leaves a gaping hole (White Box) through which France can almost flood.
Irelands defence is fractured. The folding defenders (Black Circle) are trapped by the French breakdown and Ringrose (Blue Circle) aggressively jumps out of line leaving a gaping hole (white box)
The French have provided an incredible highlights reel of attacking play within the first two rounds especially from lineout attack. The innovation in these attack sequences is incredibly precise, allowing France to dictate the flow to the defence. Having Dupont at scrum half obviously helps Les Bleus pull off these masterful attacks, but they are mainly built around ornate strike moves which target very specific defenders, and a side’s defensive weaknesses. I personally cannot wait to see what Fabien Galthie pulls out of the French toolkit, against Scotland.
If you have enjoyed looking at the French lineout innovations as much as I did. Then feel free to check out this small Youtube video showing various other examples of their attack.
As Ireland arrived in Cardiff, there was a degree of dread in the Welsh capital, after a less than fruitful 2020 in which Wales had only won three games, against Italy (2) and Georgia (1). This set the background for a clash where Wales were considered the slight underdogs. However, as the game progressed Wales became more confident, and although they were rarely the dominant side, they were able to put together effective chains of attack, and began to show the strengths of Pivac’s 1-3-2-2 structure.
Wales have formed a 3-2 pod system in the midfield, Halfpenny arrives late to play from the boot.
To study this new attack shape we can look at the sequence of play which delivered Wales’ first 3 points. Starting from a charged down Sexton kick on the 15m line, Wales immediately arranged to get a pod of 3 forwards, followed by a second pod of 2. This itself is not particularly revolutionary, but the arrival of Halfpenny as a second distributor is something that is a relatively new addition to the Wales game plan. Halfpenny could often be found as a linking player last season but is now beginning to take on a more prominent role in the attack from 1st or second receiver.
Wales play wide, with Halfpenny acting as a second distributor.
As we see Halfpenny arrives slightly late, having raced forward from covering the backfield. While Wyn Jones and the front pod provide a screen role and draw the focus of the initial Irish defenders, Halfpenny can receive the deep ball, and spread Wales to the edge of the first pod, attacking the Irish corner. This gives Wales an overlap, as Ireland’s initial press is directly opposite the pod, leaving them exposed in the wider channels. When Tipuric receives the ball he is carrying with a 4 on 2 overlap. James Lowe has raced up to provide Josh van der Flier with some support, but over runs, and becomes disjointed. Tipuric waits for James Lowe to commit to an attacker. Lowe makes a step in, turning his shoulders. Tipuric’s dummy is well timed as Lowe bites in, and then the welsh openside passes behind the Irish winger to Louis Rees Zammit.
Wales put two strong phases together to win the penalty in the middle of the park.
The second phase of Wales’ ball is on the front foot. Tomos Williams throws a pass to Ken Owens who is the centre of a pod of 3 forwards, who have shifted across the field. This pod of 3 forwards targets a 15m ruck. The importance of the 15m, is that it provides a significant blindside for defence to cover, this prevents a more aggressive defence. This 15m pod play also allows time for Dan Biggar to organise the forwards outside him. Leigh Halfpenny also begins his migration to a second distributor role.
Here is a small look at Wales arranging their new attack structure. Typically Alun Wyn-Jones would be wider, a 1 man pod.
This 3rd phase provides a great way to view Wales pod structure and Leigh Halfpenny’s option as a second distributor. Dan Biggar receives the ball and has positioned himself at the centre of the forwards pod of 3. This gives Biggar the choice of all 3 players, with Adam Beard operating an inside run. Meanwhile, Halfpenny begins behind the centre forward, a perfect position which allows him to drift off the pod late and hit the disjoint in the Irish defence developing at the widest defender on screen steps in. Ringrose does well to step in and get a ball and all tackle on Alun Wyn Jones. However the Welsh carry is dominant and gives Halfpenny an easy chance to grab 3 points from in front. While these 3 points were crucial, this 3 phase passage also gives a good insight into how Halfpenny is becoming more involved in the Welsh attack.
This graphs shows the Attack Involvements v Defence Involvements of Full Backs since 2019 RWC, Circle = 2019, Square = 2020, Cross = 2021.
As this graph shows the shift has come almost directly because of Wayne Pivac’s arrival. The square and the cross indicate the Full Back’s averages across 2020 and 2021 Six Nations games, while the circle is the 2019 World Cup. As you can see Halfpenny is becoming a more involved full back especially on attack. His use as a second distributor was probably influenced due to the selection of Jonny Williams at centre. When Wayne Pivac had the reliable Hadleigh Parkes, Halfpenny would often ply his trade as a wider link player. Such as in the example below against Italy.
Here is an example of the Wales attack structure last year. Halfpenny is positioned outwide, rather than operating centrally.
This image from the Italy game last year also helps shed light on another small change in the Wales attack. This slight change concerns the positions and organisation of the forward pods. Tipuric becomes quite easily isolated in this passage of play, and with the Openside out wide, he doesn’t offer a real threat in the attack. The splitting of Faletau and Tipuric is also something that Wales have changed, bringing both the 7 and 8 in closer to the midfield. This offers a combination of handling and physicality close to the 15m and allows Wales to really exploit the wide channels. These two phases on Wales 18th attack against Ireland really show the impact of this slight system tweak.
This year against Ireland, Wales started using Tipuric and Faletau as a connected pod.
From the wider first ruck Wales play using Alun Wyn-Jones as the first receiver. Alun Wyn-Jones has split the close 3 man pod, and allows Biggar additional space, effectively at second receiver. This is a great use of Alun Wyn-Jones’ skills , with Ireland having to worry about a carry from the lock or his passing and offloading game. The presence of Alun Wyn Jones also shifts Tomas Francis, the prop, slightly wider and allows an additional running threat for Dan Biggar to use. The presence of Francis forces the Irish corner to bite in, a hole then exposed by Johnny Williams when he receives the ball on his hard line.
On the second phase we see the influence of Tipuric and Taulupe Faletau on the 15m line. Faletau runs a slight angle drawing the attention of Earls and allowing the Irish defence to lateral. Finally as Irish support arrives Earls pushes on but this means the Faletau forces Jonny Sexton into a 1 on 1 tackle, a collision the number 8 wins easily. Tipuric then clears the ruck well and Wales win quick ball.
This is a perfect example of Wales’ new attacking framework and how it’s developed since the disappointment of 2020. The first major change is the use of Halfpenny as a second playmaker and distributor, particularly on turnover ball. This allows Wales to have more distribution in the centre of the field. The first Welsh penalty was driven by this, and Halfpenny continued this throughout the game. The second change was a more consistent and organised pod system which paired Faletau and TIpuric. The Welsh number 8 is incredibly gifted with the ball, and offers a strong carrying threat out wide, while the openside can open holes and use wonderful passes to free the surrounding welsh players.
While the Welsh performance in Cardiff on Saturday was by no means perfect, or even dominant against an irish side with 14 men. They can take pride in the new structures which are beginning to run more consistently, a really meaningful step in their new development.
From the team selected to the lack of preparation before the test series the lions tour to South Africa will get exponentially more coverage over the coming months.
The squad selected to face the Springboks this year, will be Warren Gatland’s first major headache with the back row key to the squads success. Gatland will need to balance hard graft with a bit of x factor, and players capable of linking the forwards to the backs.
The springboks have one of the best backrow units in the world, with incredible depth in the squad.It is the cream of the crop that will probably concern the lions the most, with Duane Vermulen, Pieter Steph du Toit, and inspirational captain Siya Kolisi likely to be the South African starting 3.
Duane Vermulen: Carry Machine
Duane Vermulen presents some very interesting abilities when considering him as a player. He offers a genuine carrying threat,responsible for a quarter of the carries of the South African back row options during the entirety of the Rugby World Cup. This becomes even clearer when you consider his carries per pass ratio, with the Springbok 8 only passing once every six carries.
A graph breaking down how the carrying workload was shared across the Loose Forwards.
But how does Duane Vermulen compare to other number eights in tier one nations. To start Vermulen conserves energy with less involvements than the average player. This means he’s primed to unleash his devastating carries in small bursts when most effect. Indeed his impact on a game is best summarised by his carry effectiveness averaging 3.6 meters per carry. Even more impressive is when you consider the areas that Vermulen makes his carries. Often tasked with grabbing hard yards, Vermulen can be found carrying between the two 15m lines, carving through the path of most resistance.
The Springbok Flankers: The specific tools for the job.
We can better see the role of the flanker within the South African game by looking at impact ratings. Impact rating offers a way to examine the role of a player or position within the side by discounting the glamour and focussing on the hard grunt work such as tackling and carrying.
Most teams use their flankers as the work horses of the side but the Boks mix this with hard working centres. A clear indicator of this is De Allande’s appearance as their player with the highest single impact in the ratings. South Africa’s centres and flankers both record on average an impact score of 0.1977 indicating they undertake similar roles. This is due to the Springboks favouring the flankers as major cleaners and supporting players, stats sadly not widely available.
Average South African impact rating by position: showing the fine tuned balance between Flanker and Centre.
This combination of work rate allowed the flankers to adopt a more game by game role, especially Kolisi. Looking at their attack and defence rating in the knockout matches it’s easy to see how the roles changed depending on the opponent.
Against Wales, Kolisi offered a greater attacking threat but against Japan, his impact was defensive as the South Africans looked to absorb the Japanese attack. Kolisi certainly played a more specific role, when it came to being the game breaker. The South African captain provided 19 game breaking events (a metric covering areas including turnovers, clean breaks, and defenders beaten) over the Rugby World Cup, the 6th highest of all flankers.
Attack rating v Defence rating of Springboks knock out matches.
On the other hand Pieter Steph Du Toit, helda much more structure aligned role, with slight variations based on the opponent. This was primarily on defence, explaining a higher tackle count than Kolisi. In Pieter Steph du Toit the Boks found a consistent hard worker and tenacious blindside flanker.
The Lions Back Row To Beat The Boks
how should the lions approach breaking down the South Africans and countering this outstanding back row unit. I believe they will need to focus on 3 key aspects without which a tour victory seems unlikely.
First, the Lions will need to carry effectively.
Second, the Lions should be prepared to have the ball for a long time:
with the Springboks likely to rely on a kick heavy strategy, once the lions are able to get possession in enemy territory they need to keep it there.
Finally they will need an abrasive and willing defence. The South African demolition of England, and to an even greater extent Japan, was their ability to break the gain line time and time again. It’s imperative the Lions are able to stop South Africa’s momentum at source.
So what options can the lions field and how do they fit with an overall balance and strategy?
Looking at current international squads and starting with the openside flanker, it’s clear there is a deep pool of talent to pick from, who could fill similar roles, should Warren Gatland cast his eye in their direction. For example Jamie Ritchie and Justin Tipuric, while the combative Scot and the silky skills of Tipuric may seem incredibly different both offer a hybrid option. With Tipuric recording 13.43 involvements on both attack and defence, while Ritchie had 12.63 and 12.88 involvements on attack and defense respectively.
This hybrid option could provide Gatland with the ability to use a game breaking flanker. Able to defended stoically whilst offering a threat on attack.
Defence Involvement v Attack Involvements showing, the work rate of a player on both sides of the ball.
Data wise Justin Tipuric looks the better pick of the two. An outstanding player the Welshman out scored the Scot intackle volume, tackle success and, carry effectiveness. Tipuric also offers a game breaking option outscoring the Scot 36 to 30, though on average Ritchie outscored Tipuric to 3.75 and 3.6.
A comparison of Justin Tipuric and Jamie Ritchie.
Gatland may well consider another Scottish flanker who offers an ability to carry well. Hamish Watson recorded a carry effectiveness of 3.9 and a meters per carry of 3.5. He also offers a strong defensive option, Watson had the 2nd highest defensive rating of all flankers to play 140 minutes since Japan beat Russia in the World Cup (outscored by only Argentine workhorse Marcos Kremer).
So should Gatland look for someone willing to carry hard and straight and blunt Springbok defences then Watson could be his man. Perhaps Watsons inability to offer a threat more often may undermine his chances,an average attack involvement of 10 per game was 3 lower than Tipuric and team mate Ritchie.
One player highly likely to pack down at flanker, though he may be just as comfortable at 8 is Tom Curry. One half of Jones ‘Kamikaze twins’, Curry has become a key stone for the England team. His versatility could see him become a useful option should there be a yellow card. His appetite for work has not only seen him average the 4th most runs of players within the home nations but he has also become an effective carrier recording 2.6, he has a higher meters per carry than Talupe Faletau and similar effectiveness to Billy Vunipola when on the ball.
But it is in defence Curry could play an integral role.
Median defence involvements against minutes.
Alongside strong back row, Curry may well offer the perfect hybrid solution for the Lions. However as shown on the above graph, he sits incredibly close to Stander (and above Tipuric), showing that his involvement in the tests may not be the forgone conclusion many assume. There is no doubt he will go, but others in the home nations offer turnover threat, as well as slight improvements both offensively and defensively meaning he’ll be battling to take that spot.
The number 8 debate, maybe the most contested in the squad with 3 main options for the Number 8 shirt; Taluape Faletau, Billy Vunipola and CJ Stander.
Each player has their own specific strengths and advantages and we may well see the 8 shirt handed to a player with a specific role in mind.
Ireland’s CJ Stander has been a strong candidate throughout 2020. An incredibly important player for the Irish since Heaslips retirement, Stander offers an incredible volume of carrying for the lions. While he does sometimes lack effectiveness, only managing an average of 1.7 meters per carry, his high workload could be key to allowing the remaining backrowers to be held back for game breaking moments. This work rate makes him an incredibly appealing option for the Lions.
Two graphs, showing involvement and quality on both sides of the ball. Blue – World Cup, Orange – Six Nations.
As shown in the graph, Stander at the World Cup was the most involved player on both attack and defence.
He had the highest defensive rating at the World Cup, while his attack rating was sitting on the average for the home nation 8s. What may be a concern for the Lions is the shift of role under Andy Farrell whereStander is required to fill a more prominent attacking role impacting his defensive rating, as the Irish 8 slipped behind Taluape Faletau, and number 8 novice Tom Curry. He did however continue to outscore Billy Vunipola’s defensive rating.
Whilst Billy Vunipola did have a low defensive rating this is largely due to the England eight being preoccupied with his role in attack. providing much of England’s go forward.
He was an incredibly effective and constant attacker for England in Japan, with an average of 17 involvements on attack while maintaining an attack rating of 7 and it’s this quality that could provide the Lions with the strong ball carrying number 8 they may need. Vunipola averaged 2.4 meters per carry, the highest of the 3 players being considered. This is even more impressive given Billy Vunipola’s more central role.
Carry Effectiveness v Carry Volume
The final option for the Number 8 shirt is Taluape Faletau. The Welshman offered a different option to the previous contenders.
While Stander and Vunipola tend to be used centrally, Faletau is primarily a wide option for Wales, he probably also offers a more skillful option to confrontational abilities of Stander and Vunipola. This does limit the amount of touches Faletau makes, however he is an integral part of the welsh back row. His involvement will depend largely on the game plan adopted by the Lions. If the use of the second row to carry is prominent then Faletau offers a wide carrying option. But should the Lions struggle, and Faletau get dragged in from the touchlines, the other options available may provide better alternatives.
The final position is the lions blindside flanker. The problem as with Pieter Steph du Toit, is that what makes some blindsides great is the unseen work they undertake but a good Number 6 is perhaps the key to the back row conundrum.
Peter O’Manhoy is likely to be a strong choice at blindside. A strong option in the lineout, he also balances the back row allowing other players to undertake the highlight reel grabbing plays.
The Irishman is strong over the ball securing 6 turnovers during the world cup and Six nations. This ability to pilfer the ball could play an important role in breaking down the resolute Springbok defence.
He has also adapted to become a strong distributor for the Irish recently, averaging just 1.38 carries for every pass. Should the Lions choose to play wider he could prove an important player. He also offers the ability to be a soak carrier, responsible for 10% of Ireland’s carries of backrowers over 100 minutes.
Finally Aaron Wainwright having burst onto the scene in 2019, offers a delicious option for the tour. An incredibly strong attacker, with a rating of 9.11, shows that while he fulfills the more traditional aspects of the role he is more than capable when given the ball.
This strong attacking ability could see him given more ball on the lions tour, especially if he can get himself slightly wider in attack where his most profitable carrying can come to the fore. An effectiveness of 4, even if just from 2 carries on average, shows that when Wainwright is given the ball sparks could fly.
A comparison of the Lions blindside options.
While there are surely more options that can and should be considered to fill the blindside void, the balance of the back row will be crucial for the Lions chances of success.
While kicking will certainly play a role in stopping this, the Lions are no doubt going to need strong carriers as they find they are likely going to have to grind their way up the pitch against one of the strongest defences in world rugby.
For this reason I think that the lion’s back row is going to need to be dominant, the focus of my choice of 6, 7 and 8.
6 – Tom Curry – While Curry was never a field leader in any of the stats. He could provide the consistency needed at 6 for the lions. The Sale Sharks flanker is certainly more comfortable here than at the back of the scrum, and his new found experience at 8 could offer the lions increased carrying power.
7 – Justin Tipuric – The welshman has well documented silky skills, and the ability to play an attacking game is crucial for the Lions who will need to take their opportunities when they arise. Couple with this his ability to win turnovers and create game breaking moments and he becomes an incredibly important piece.
8 – Billy Vunipola – The Englishman could provide just what the Lions are looking for in terms of a carrying number 8. The ability to generate gainline contacts, and drag the attack forward will be crucial. The lack of defence involvement could be a worry, but this should be covered through Curry’s appointment at blindside.
So there we have it. I have stuck my head above the parapet and would love to hear your thoughts, where I went wrong and who you would select. Overall, I am looking forward to the Lions tour, it is going to be special.
The Gallagher Premiership returned last Friday, and while the ink had barely dried on the final, we were served up with some great rugby. The first two tries of the Premiership season whet the appetite, and showed what could be in store this season. Both had remarkable similarities, starting from a lineout and being finished by forwards. However, they also showed the range of attacking options available to sides when using the Set Piece. Akker van der Merwe’s try was built in the fringes, and involved just 1 pass. Meanwhile Sam Simmonds scored his first try off the back of lovely interplay using 3 passes to find the weak point in the Quins defence.
The Akker van der Merwe try starts from a 5+1 lineout, with the +1 indicating that Ben Curry – a forward – will act as Half Back. The use of Ben Curry at half back is incredibly interesting, and has become a common lineout set up. By employing a forward here, the maul can be set a lot faster with Curry simply able to take the ball straight from the jumper. During Sale’s walk in to the lineout we can also see another interesting aspect of their lineout set up.
Sales 5+1 Lineout uses Curry at the half back position
As highlighted by the red box, Sale have their two jumping options positioned next to each other. This concentrates their threat. It also means that any dummy jumps are more impactful. With both players also able to list, this setup allows Sale to manipulate Northampton’s lineout defence.
Sale throw to tail following a small amount of misdirection drawing Saints to the middle.
The impact of this dummy jump is really important.Notice the movement by Sale’s number 4. He takes a step backward, revealing the possibility that Jono Ross could jump moving forward. This drags not only his opposite man, but also the Northampton number 6. By dragging Isiekwe and Rainyurawa with him, Wiese disrupts a possible competition pod from the Saints. Isiekwe – who would be the front lifter – has to turn with Ross, and means that the Saints jumper is late to compete. This allows Sale to get clean ball, with Akker finding the jumper at the top of his leap. With stage one of the lineout complete, the Sharks move onto positioning the maul, where they can open up the opportunity for the back peel.
Notice the imbalance created as the Saints player is late to join the maul.
While it’s not quite clear using the magnification tool, we can focus on the actions of Sale’s number 4. Having acted as the focal point of the Shark’s deception, he now bounces around to the far side of the maul, pushing on the outside of the original lifter. Meanwhile, Api Rainyurwara (red square) enters the maul more centrally. Northampton have failed to counter the Sale push directly, leading to the maul spinning.
Also notice the Saints player who is standing off at the front of the maul. He has to stay and protect the blindside 15m channel, but is watching the ball. This prevents the guard from seeing Akker tracking across, and possibly alerting the openside guard to the movement.
The final stage of the try is Ben Curry’s back peel. The openside flanker darts from the back of the maul with deliberate timing and precision, thus opening a hole and allowing van der Merwe to charge through.
The Sale hooker charges through unsighted by the Saints hinge defender.
The first key is that Curry runs outside the first defender. With the majority of the Saints team having to start 10m back, the hinge defender’s first objective is to secure the seam. This means that with no aid on his outside, the Saints defender shifts across. His attention may also be drawn by the option of Sale’s number 5 running a hard line. The big tackle that Curry draws from the joining Saints defender is another example of how Curry has drawn attention away from the inside ball. The final aspect that allows van der Merwe to break the line and charge over is the shielding he receives from the maul. With the maul spinning, the Sale players can use a bit of gamesmanship to maintain the hole, and allow van der Merwe to drag the tacklers over the line.
The second try of the season came from Exeter’s game against Harlequins, with Sam Simmonds profiting from another beautiful lineout move to carve through and score a brilliant first try. The try showed a small change in order to increase the speed of Exeter’s attack so they could hopefully catch Harlequins cold.
Exeter call a 4 man lineout. Scrum half Jack Maunder positions at the front.
The Chiefs call a 4 man lineout, acting with speed to take the Quins by surprise. One point of interest surrounding the Chiefs’ set up is the positioning of scrum half Jack Maunder. Maunder is at the front attracting the interest of the front Quins defender. He is then able to peel away and receive the ball. His peel also opens up a new front option for the Exeter lineout. Because Quins aren’t expecting a non lifting pod, they contract to the front and are unreactive in the second after Maunder pulls away. Danny Care remains largely stationary in the 5m channel, illustrating the surprise.
Exeter use 2 pods to spread their threat and deceive the Harlequins defence
The Exeter attack is multilayered, aiming to manipulate the Harlequins defence. The Chiefs have their attack formed into 2 pods, with both pods consisting of a lead runner and an out the back option. The first lead runner (dashed black circle) plays an important role in holding the inside defenders. This has the combined effect of not allowing the Harlequins’ second line to move too quickly. This leads to the second line of Quins defenders beginning to hold their feet, and slowing down. The pull back option shown by the yellow square begins to drift outside. This fixes the outside of Quins second defensive line. This is crucial in creating the hole for Sam Simmonds to break through.
Sam Simmonds attacks breaking through a disjointed Harlequins midfield.
As the 1st pull back option drifts around and flattens, he forces Esterhuizen to follow him. This means the Harlequins centre is blindsided by the second pod options. This forces his outside man to bite in on the tip runner. However, the far outside defenders have pushed beyond the ball. They may be expecting the ball to come out the back to Woodburn, another variation on this strike play. On this occasion, the over-aggressive push of the Harlequins defence on the outside forces a hole which Sam Simmonds can sprint through.
The first two tries of the Gallagher Premiership season therefore contained both similarities and differences. While both were built through expert manipulation of the defence, the Sale score relied on driving power, with the maneuvering of the maul opening a gaping hole for Akker van der Merwe. Meanwhile, the Sam Simmonds score came from a double layered strike move which maneuvered the defence with guile and speed. Both tries were built through defensive manipulation, but as always in rugby there is always more than one way to score.